Grow your own vegies
Growing your own has never been sexier — getting the earth to bare its shoulders, draping it with a mantle of green, offsetting it with a nice rope of ripe red tomatoes. For many, that’s the romantic image of gardening.
Then the problems set in: sudden influxes of seed-hungry birds; unidentified garden-eating caterpillars; sooty mould on the cucumbers; plants set on shrivelling and dying (God knows why) and no tomatoes, but a choker chain of unwanted plants more commonly known as weeds. Where do you start, what do you need and how do you repeat a first-time success?
Be clear about what you want to achieve
Do you want to enliven your cooking with a few herbs and spices or is your goal to provide all your own fruit and vegies? How do you want it to look? Do you have in mind an English-style garden of straight-rowed perfection, the kind most commonly seen in children’s books, the ones hardest to achieve? Could you handle a garden where plants may sprawl across paths as they set seed, and volunteer tomatoes spring up in unexpected places, making a mess of your beautiful, colour-co-ordinated lettuces?
Will you invest a lot of money in buying everything new and ready made, or are you willing to get into a bit of DIY with the timber your neighbour’s throwing out? How much area do you need? Even if it’s a big goal, start small; get the hang of it before going the whole hog.
Site analysis
You don’t need to be a scientist to garden, but it’s good to think about the practicalities of your site.
- Aspect — is it facing the right direction? In temperate climes, you’re going to want as much northerly sun as your soil can get its microbes on, while in hotter areas you might need a shaded spot to protect plants from cooking before they get to your pot. Walk around the area and take note of what sun you have and what winter dose, when the sun is low, your site is likely to receive.
- Slope — in high rainfall areas, a slope could be a bonus, as plants and trees won’t stand around with wet feet long enough to get something fungal such as phytophthora or root rot between their toes. But if the slope is the type to suggest crampons and guide ropes, you may need to think seriously about terracing an area so your soil is not washed down the hill every time it rains. Also, carting your bumper pumpkin crop from the bottom of the garden to the top in a wheelbarrow could see you nominated for a masochist award. I’m a previous winner.
- Location — like real estate, gardens are all about location. Find out your garden’s pluses and minuses and then decide how best to organise it so that it results in less work, not more. Plant the ingredients most commonly used in cooking, like herbs and vegetables, close to the house, and less frequented crops such as fruit/nut trees on the outer limits.
- Soil type — no matter how bad it is, soil is the one ingredient in your garden recipe that can most easily be improved, but it’s time to get down on your knees and have a look at it. It’ll be the same stuff you’ll be scraping out from under your fingernails in days to come. Is it sand, silt, clay, loam? Does it have stones, rocks, boulders? Do you know if it’s been a dumping ground in the past for chemicals that you wouldn’t want to end up in your sandwich?
- Soil pH — is it acidic or alkaline? Lots of plants will only thrive within quite narrow pH levels. Australian soil is generally more acidic than alkaline; a dose of lime or dolomite will resolve that, but you’ll need to know if it’s necessary first. A pH testing kit will cost around $20 at your local nursery. If your soil barely rates the term, you can build on top of it with layers of organic material that will break down over time and create a workable medium for plant growth.
Getting started
Once you’ve made all the initial decisions, it might be a good time to draw up a plan of how you’ll achieve your backyard miracle. If it’s a grassed area, rather than haul up precious inches of top soil you can give the area a good soak, lay down old carpet or weed mat to kill off the grass and let it form additional organic matter. Lift the edges to check how things are going; when the light exclusion has created sufficient die-off, remove the covers, sprinkle the area with lime or dolomite (if required) and pelleted chook poo and dig it over with a garden fork.
Alternatively, hire/borrow a rotary hoe for bigger areas. Most plant roots will need a good 30cm of loosened soil to make it easier for their roots to “root around†for nutrients. The goal is to turn it over only once. Each time you do, you lose soil carbon, nutrients, microbes and structure: you also bring the dormant weed seeds to the surface where they can germinate, creating more work down the track.
Once your new garden has been dug over, mulch it heavily. This will help to reduce weed re-establishment, shelter the soil, retain moisture, regulate soil temperature and introduce nutrient gradually as it breaks down.
Now, leave it a week or two to settle, then part the mulch and either sow seed or plant nursery-raised seedlings or ones you’ve raised yourself. Don’t overwater — seeds can rot and seedlings that emerge will be vulnerable to fungal diseases. With beans, for example, water once and not again till they’ve surfaced (generally a week later).
Watering with an organic seaweed foliar feed will help stave off fungal problems while encouraging early strong growth. Most plants, if struggling early on, are like children and may fail to thrive forever more.
Watering: a hot potato!
With most areas of the country in drought, recovering from drought or looking down the barrel of drought, careful consideration of how you set up your watering system to conserve water is crucial. Check with local council regulations first. Setting up a drip system tucked away under mulch is a better idea than using a spray system that results in a higher evaporative loss.
In most cases, watering once a week, at night and in conjunction with mulching is the most water-efficient way to go. You can buy a water meter probe that will indicate the moisture content of the soil, but a probing finger can detect moisture just as well. Try not to stress plants by monitoring soil moisture using the “look the plant has wilted — better water it†method.
Be proud to have worms
If it has never been a source of pride before, having worms soon will be. Worms indicate a healthy soil full of humus and their job is to tunnel into it, aerate it and evacuate their castings (beneficial worm poo). When we first started gardening in Tasmania, there wasn’t a worm to be found and I despaired; now they’re in large numbers and sizes to gladden the heart. Our son, when young, was often heard to yell, “Snake in the garden!â€, terrifying us all, only to find he’d unearthed a particularly large worm.
Choosing what to plant and when
Seed packets provide a guide to when to plant in what climatic zone. There are also charts available in gardening books to guide you. It’s a common mistake to plant out of season and find that your greens bolt straight to seed, as daylight hours, temperature and season all have a hand in how your plants grow. The seed packets should provide a guide to the plant’s likes and dislikes, too; for example, seed spacing, sowing depth, soil preference and maturing times.
Growing your own vegetables is addictive — it’s also membership-free exercise — and your garden is a great place to meditate while you’re pulling weeds. Plus, your produce is far more nutritious than the jet-lagged supermarket variety, and arranging it on the dinner plate, while not romantic, is sublime.
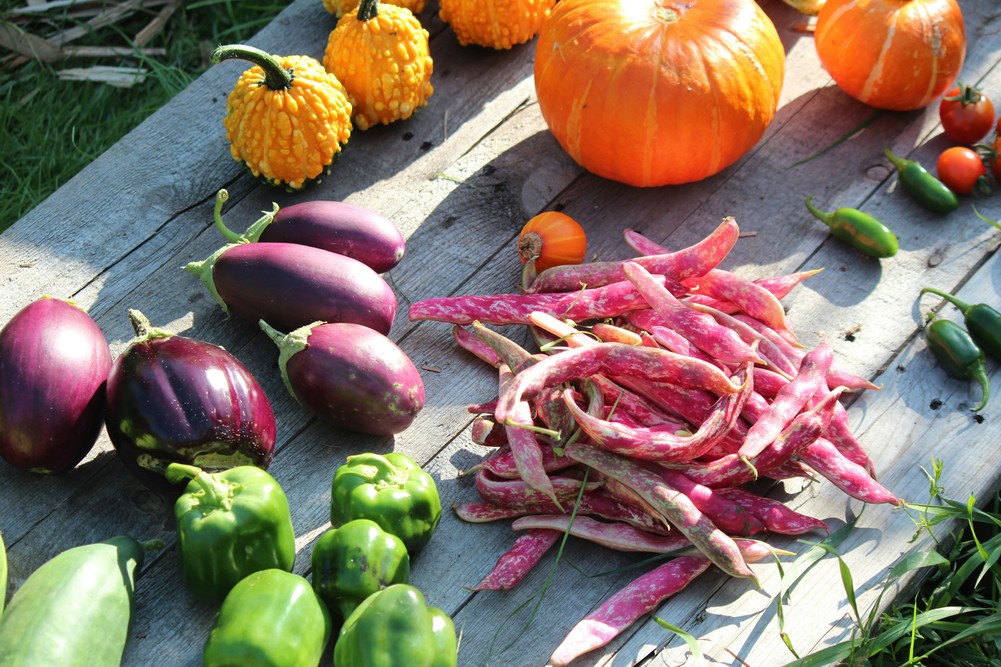
A quick guide to vegie growing
Always chose varieties that are suited to your climatic zone.
Carrots and onions
They don’t like their soil rich, which makes them good companions — too much nitrogen and carrots will fork and twist and grow hairy; onions will have a heavy top with not much bulb and they won’t store well. Their roots are at different depths, so they don’t compete for the same nutrients. Planting them in alternating rows of carrots/onions can also disguise carrots and put the carrot root flies off.
Always direct sow both. This means, grow them from seed sown directly into the soil. They don’t like having their roots disturbed, which will happen when transplanting. Carrots and onions both have tiny seeds and are easier to sow evenly if you place the contents of each seed packet in a jar with half a cup of sand, shake well and draw a thin line of sand into shallow trenches.
As they start to grow, thin them out to the spacing specified on your packet. If you have shallow soil, go for short, stumpy varieties of carrots such as Nantes or Chantennay. You can start pulling them out at finger size and call them baby carrots. One patch can provide over a long period. They store best in the ground. Onions are generally ready to harvest when the tips of the spears turn brown and fall over.
Broccoli, cauliflower, cabbages
They’re cool-season plants that need feeding, especially early on. An organic boost of seaweed/fish fertiliser on a weekly basis will help, along with chook poo either purchased from your nursery or from your own chooks, but never fresh (wet and sloppy) as that will burn the young plant. Cabbage moths lay eggs on the undersides of the leaves and their offspring will quickly skeletonise them. Dipel is a bacterial product you can purchase that gives them a gut ache and organically finishes them off. In some areas, it’s a must if you ever want to see the finished thing on your plate. For this reason they are the most heavily pesticide-sprayed of the supermarket vegetables. Heirloom varieties such as Romancesco are beautiful and also incredibly sweet and tender.
Pumpkins
They are very frost-sensitive. In warmer climates, they’re happy to grow wild and will infiltrate your garden given half a chance. Best to keep on top of them early on — train them up a trellis or as an understorey to corn. I put a stake in the ground close to where they are planted so I can water and feed the main plant, though they put down their toes into the soil and feed along any of their long “limbsâ€. They like it rich, too. Planting them in composted material will help feed them. Harvest them when the stalk has browned off.
Potatoes
Frost-sensitive, they also like their tucker. A rich, mulched bed will increase your yield. They start forming potatoes after they’ve flowered and you can get into the time-honoured tradition and go “bandicootingâ€, searching around the root area, taking care not to damage the root system but filching a few early potatoes before pulling up the whole plant later on in the season. Always plant disease-free potatoes bought from a nursery. Don’t lime the beds or you may risk getting potato scab. They like their soil slightly acid.
Cucurbits — cucumber, zucchini and squash
Quick to crop and prolific — a little goes a long, long way — these are the source of most garden gluts. They’re easy to grow, require lots of water and like a rich soil. Plant four seeds in a 10cm area; when they’re young, pull out the weakest and leave one or two to grow. Once they start producing, a zucchini 5cm long in the morning will be 20cm by the afternoon. Avoid overhead watering as they are prone to fungal diseases. A sunny, open patch with good airflow is required.
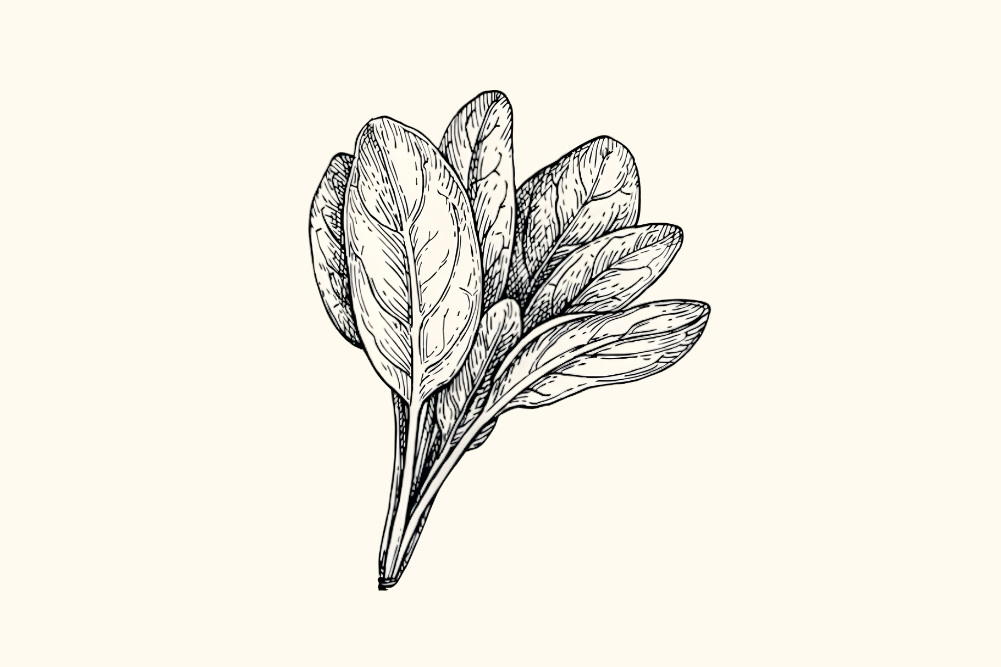
Members of the greens family
These are generally cool-season plants, such as lettuces, rainbow chard, kale and spinach. If they get heat stressed, they tend to bolt, which doesn’t mean they’ll pick up their leafy skirts and leave the garden, but go to flower and seed. They’ve decided that now’s the time to preserve their genetics by creating the next generation. Leafy greens can be harvested over a long period. Pick the outside leaves first (possible with non-hearting lettuces, too). They like a rich soil and need to grow quickly to remain tender and sweet.
Corn
Arguably the hungriest and thirstiest of them all, corn is actually an overgrown grass. Plant it in blocks rather than long rows, as they are wind pollinated. Poorly pollinated corn will have only a few kernels on the cob. Pull the ears off with a sharp downward tug after the silks have browned off and withered. If you’re not sure, press a fingernail into a kernel; it should produce a milky white sap.
Peas and beans
You might put them together in a sentence, but not in the garden. Peas are planted first, as they can take a frost, whereas beans won’t. Both vegetables have climbing and bush varieties. Climbers are good space-savers in a small garden and crop heavily. Both peas and beans require frequent picking to keep them productive. Harvest in 8–12 weeks.
Tomatoes
A warm-season plant, they are particularly frost-sensitive. They can also be a challenge to grow in warmer climates, as the native fruit fly can result in a harvest of rotten fruit. Ask your nursery whether this pest is an issue in your area and for advice on organic methods of control if it is. The effort is worth it. The difference between home-grown tomatoes and the crash-test variety in the supermarket, grown for their ability to look good and survive long-distance travel, is enormous. You’ll add them to your salad for their taste rather than the aesthetic dash of red. As with peas and beans, there are climbers and bush varieties.